Wednesday, June 30, 2010

Fourth Of July Cupcakes and a printable


 I decided to make some Fourth Of July cupcakes and use my printable cupcake toppers/tags on them. I just used a simple vanilla cupcake with white buttercream frosting. Added a few sprinkles and VOILA, they came out really cute. 


Since the 4th is falling on a Sunday this year, our town is doing a lot of the celebrating on Saturday. I am excited to take my daughter to see the fireworks this year. I didn't take her last year, because I wasn't sure how she would react with her being smaller. Food is another part that I am excited about. I love all the grilling and cooking that comes along with any holiday. So I am sure I will need the gym ASAP when its all over. 


Here are the Fourth of July tags I created just because and you can use them too. Just cut along the column and use a 2 inch hole punch to cut them out. They can be used for cupcakes, napkin rings, favor tags, wine glass tags, the possibilities are endless. Get creative!

Tuesday, June 29, 2010

Twilight Cookies

Tonight at midnight is the premier of Eclipse from The Twilight Saga! I absolutely LOVE The Twilight Saga. I haven't read all the books yet (such a slacker) due to other things needing my attention like my demanding daughter and life itself. Some me time is definitely needed to catch up on some reading, one of my past loves. Though, I didn't make any plans to see it on the first night, I plan to see it soon after the hype calms down a little bit. I wanted to make some treats to go along with the theme and decided on some red velvet cookies. I made these cookies before and they were really good so I had to try them again using a drizzle technique. Eclipse premier night was a great opportunity.


Twilight Red Velvet Cookies
Printer Friendly

Twilight Red Velvet Cookies

Ingredients
1 Box red velvet cake mix
1/2 Cup butter, softened to room temperature
2 Eggs

Topping
1/2 bag of Candy Melts in white
1 disposable decorating bag
Size 2  Wilton decorating tip
Coupler (optional)
Wax paper


Preheat oven to 350 degrees.
Mix ingredients until combined. Drop spoonfuls of cookie batter onto baking sheet about two inches apart. Bake for 10-12 minutes. When done baking, let them cool completely.

Line your surface or a cookie sheet with wax paper (helps with clean up). Prepare your Candy Melts according to the package. Put your decorating tip inside your bag. Make sure you cut an opening for it - not too big or not too small. Or if you are using a coupler, put the coupler in the put the tip on.

You may need someone to hold the decorating bag for you for the next step.

Pour candy melts into your decorating bag. Make sure you hold it over wax paper or a small container. It may leak out the tip a little bit. Then you are ready to decorate the top of your red velvet cookies. Try a practice round drizzling on top of wax paper so you can get a feel of the way you want to drizzle your decoration. Enjoy!!!!

Source: Adapted from Bakerella

Friday, June 25, 2010

Oh so good, Chewy Chocolate Chip Cookies


These cookies were amazing. Who doesn't like a good chocolate chip cookie? I usually stay away from making them because I hated how sometimes they came out hard after they sat for a while. Then my husband started telling me to microwave them to warm them up and make them soft again. How come I didn't think of that??!! Since then, I started to like chocolate chip cookies more.  Not that I didn't like them before, just kind of didn't eat them as much.


I found this recipe on another BLOG that I love. All I can say is they seriously did not last long. I kept eating them and going back to the dish where they were. Decided it may be a good idea to take some to my in-laws. The next day I went over there, the cookies were GONE! Hope you enjoy this recipe as much as we have.


Thick And Chewy Chocolate Chip Cookies

Ingredients

2 cups plus 2 tbsp. all-purpose flour
½ tsp. baking soda
½ tsp. salt
12 tbsp. unsalted butter, melted and cooled until warm
1 cup brown sugar, packed
½ cup granulated sugar
1 large egg plus 1 egg yolk
2 tsp. vanilla extract
1 ½ cups semi-sweet chocolate chips

Directions

Adjust oven racks to upper and lower-middle positions.  Preheat oven 325°.  Line two cookie sheets with parchment paper.

Whisk dry ingredients together in a medium bowl; set aside.  With electric mixer, or by hand, mix butter and sugars until thoroughly combined.  Beat in egg, yolk, and vanilla until combined.  Add dry ingredients and beat at low-speed just until combined.  Stir in chocolate chips.

Roll a scant half-cup of dough into a ball.  Holding dough ball in fingertips of both hands, pull apart into two equal halves.  Rotate halves 90 degrees and, with jagged surfaces facing up, place formed dough onto cookie sheet, leaving ample room between each ball.  Bake, reversing position of cookie sheets halfway through baking, until cookies are light golden brown and outer edges start to harden yet centers are still soft and puffy (approximately 11-14 minutes).  Do not overbake.

Cool cookies on sheets until able to lift without breaking.  Transfer to a wire rack to cool. 

One thing I did differently - I split the recipe in half in 2 separate bowls, then added 1-2 tablespoons of Hershey's dark cocoa powder to one of the bowls. Then resumed the recipe as normal.


Sources: Found on Annie's Eats and adapted from Baking Blonde, original from Baking Illustrated

Thursday, June 24, 2010

German Chocolate Cupcakes & Red Velvet Mini Cakes

 
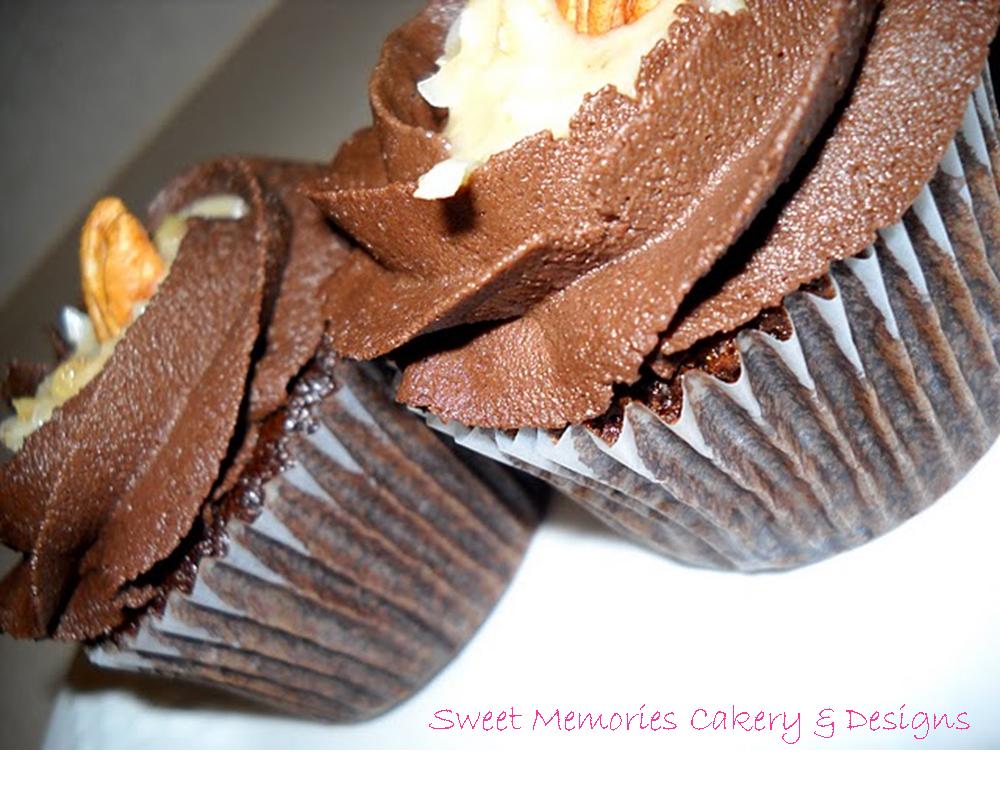
My husband LOVES German chocolate cake. Though we have been married for 4 years, I have never made him a German chocolate cake. One reason was I didn't like coconuts and thought how could I surprise him with something I haven't tasted. Everything has to go through my taste test before being served. Eventually I did come around to liking coconuts and was able to make him something German chocolate. I chose cupcakes and made them for his Father's day treat. They came out wonderful. Super moist cake, chocolate frosting with a center of German chocolate icing/topping.


And along the lines of Father's Day treats. I made these red velvet mini cakes for our dads. Both our dads love red velvet cake. And once again, I didn't always make red velvet cake because I thought cream cheese was gross. My sister was the one that would make it for my dad in the past. I decided to make it this year. The red velvet cake was delish!
 

I could have just eaten that all day by itself, which I kind of did that anyway. The first batch I made, I decided to be lazy and spray my pans with PAM instead of using my easy off stuff I normally use. BAD IDEA! Things got messy trying to get the cake out the pans. So I just crumbled the cake up and put it in another container to brave another recipe that called for crumbled cake.

Sorry For the poor quality picture, my camera was being silly.

Wednesday, June 23, 2010

6-23-06 The day I became Mrs.

Today I celebrate being married to the most wonderful man, one that I can truly call my best friend. I am very honored to be able to call him my husband and I thank God for putting him in my life. Words can't describe how much he means to me. We met in June of 2005, got married in June of 2006 and had our wedding on our 1 year anniversary in June of 2007.

Happy Anniversary Babe!

I put together a few pictures with our wedding colors - Blue and white with a touch of pink.


These were our engagement pictures.


I was planning on making a cake for our anniversary, but we are still munching on a lot of cake and cupcakes I made over the weekend for Father's day. And I wouldn't be able to restrain myself from more cake.


Tuesday, June 22, 2010

Cake Decorating

Ever since my mother-in-law signed me up for my very first cake decorating course, I have been in love with cake decorating! I started to enjoy cooking when I got married and then baking came along, although my sister and I would bake a lot of times with my mom. So to add cake decorating (the right way) to baking cakes was just wonderful. A cake creation that tasted good as well as looked good - perfect. My next thing needs to be decorating a tiered cake. I have let that intimidate me for quite some time now and I really don't know why. Once I try it, I know it will be a piece of cake. I am making a promise to myself to try it one day VERY soon.

Here is one of my VERY first decorated cakes.


This is my 2nd cake fully decorated.


This one is from Course 3, but not my 3rd cake.


And here are a few that were done for friends and family


This one was one from just starting out with cake decorating. And took the picture with my phone. Was rushing to get out the door and couldn't find my camera. So sorry for the not so good picture.


Some of my other work can be seen HERE, HERE, and HERE

I love that you continue to learn with each cake made. It is so relaxing to get into the zone of cake decorating and baking. That is so my therapy for a stressful or crazy day, just get in the kitchen and bake a cake (or cookies, brownies, pies.....hungry yet??)


Monday, June 21, 2010

Swiss Meringue Buttercream {Recipe}


Don't you just love the name of this buttercream! Maybe its just me, sounds elegant. Okay you can call me crazy. I love making this buttercream. It takes a little longer to make than the regular wilton buttercream, but it is simply delicious. Its not as sweet  as the regular buttercream so it satisfies the taste for those who don't like extremely sweet icing and it has a more creamy texture. I make this one sometimes to change things up or depending on my time. I haven't tried icing a whole cake with it yet, so that is something that I have to try. So it usually goes on cupcakes. I have noticed that sometimes the heat from your hand can melt the icing a bit while icing a cupcake and sticking it in the freezer for about a minute or so to let it harden a little. Some people use two piping bags, one in the fridge while working and when the one you are working with gets a little runny, switch it out with the one in the fridge.

Enjoy!!


Swiss Meringue Buttercream Icing for cupcakes
Printer Friendly

Makes about 9 cups, enough for about 28 cupcakes

Ingredients
 2 1/2 cups sugar
10 large egg whites
4 cups (8 sticks or 2 pounds) unsalted butter, cut into pieces
2 teaspoons pure vanilla extract

Directions

  1. Place sugar and egg whites in the heat-proof bowl of an electric mixer. Set bowl over a pan of gently simmering water, and whisk until sugar has dissolved and egg whites are hot to the touch, about 3 minutes. Test by rubbing the mixture between your fingers; it should feel completely smooth. 
  2. Transfer bowl to mixer stand. Using the whisk attachment, beat on high speed until mixture has cooled completely and formed stiff and glossy peaks, about 10 minutes.
  3. Add the butter, one piece at a time, and beat until incorporated after each addition. Don't worry if the buttercream appears curdled after all the butter has been added; it will become smooth again with continued beating. Add vanilla, and beat just until combined.
  4. Switch to the paddle attachment, and beat on the lowest speed to eliminate any air pockets, about 5 minutes. If using buttercream within several hours, cover bowl with plastic wrap, and set aside at room temperature in a cool environment. Or transfer to an airtight container, and store in the refrigerator, up to 3 days. Before using, bring buttercream to room temperature, and beat on the lowest speed with the paddle attachment until smooth, about 5 minutes. 

Source : Martha Stewart

    LinkWithin

    Related Posts with Thumbnails