Thursday, March 24, 2011

{Tutorial} DIY Curtains

I know I mostly talk and blog about food and papery designs, but from time to time, I like to post some other things designs related on here. My daughter has moved to a "big girl" twin size bed and I have been wanting to redo her room. Well she has been in a big girl bed since before she turned two, it was just a toddler daybed from when I converted her crib. She absolutely loves the twin bed! I won't post pictures of it yet as I am not done with all my shopping and found the right, comforter just yet. I may just make my own. :-) Like I kinda-sorta did before she was born here


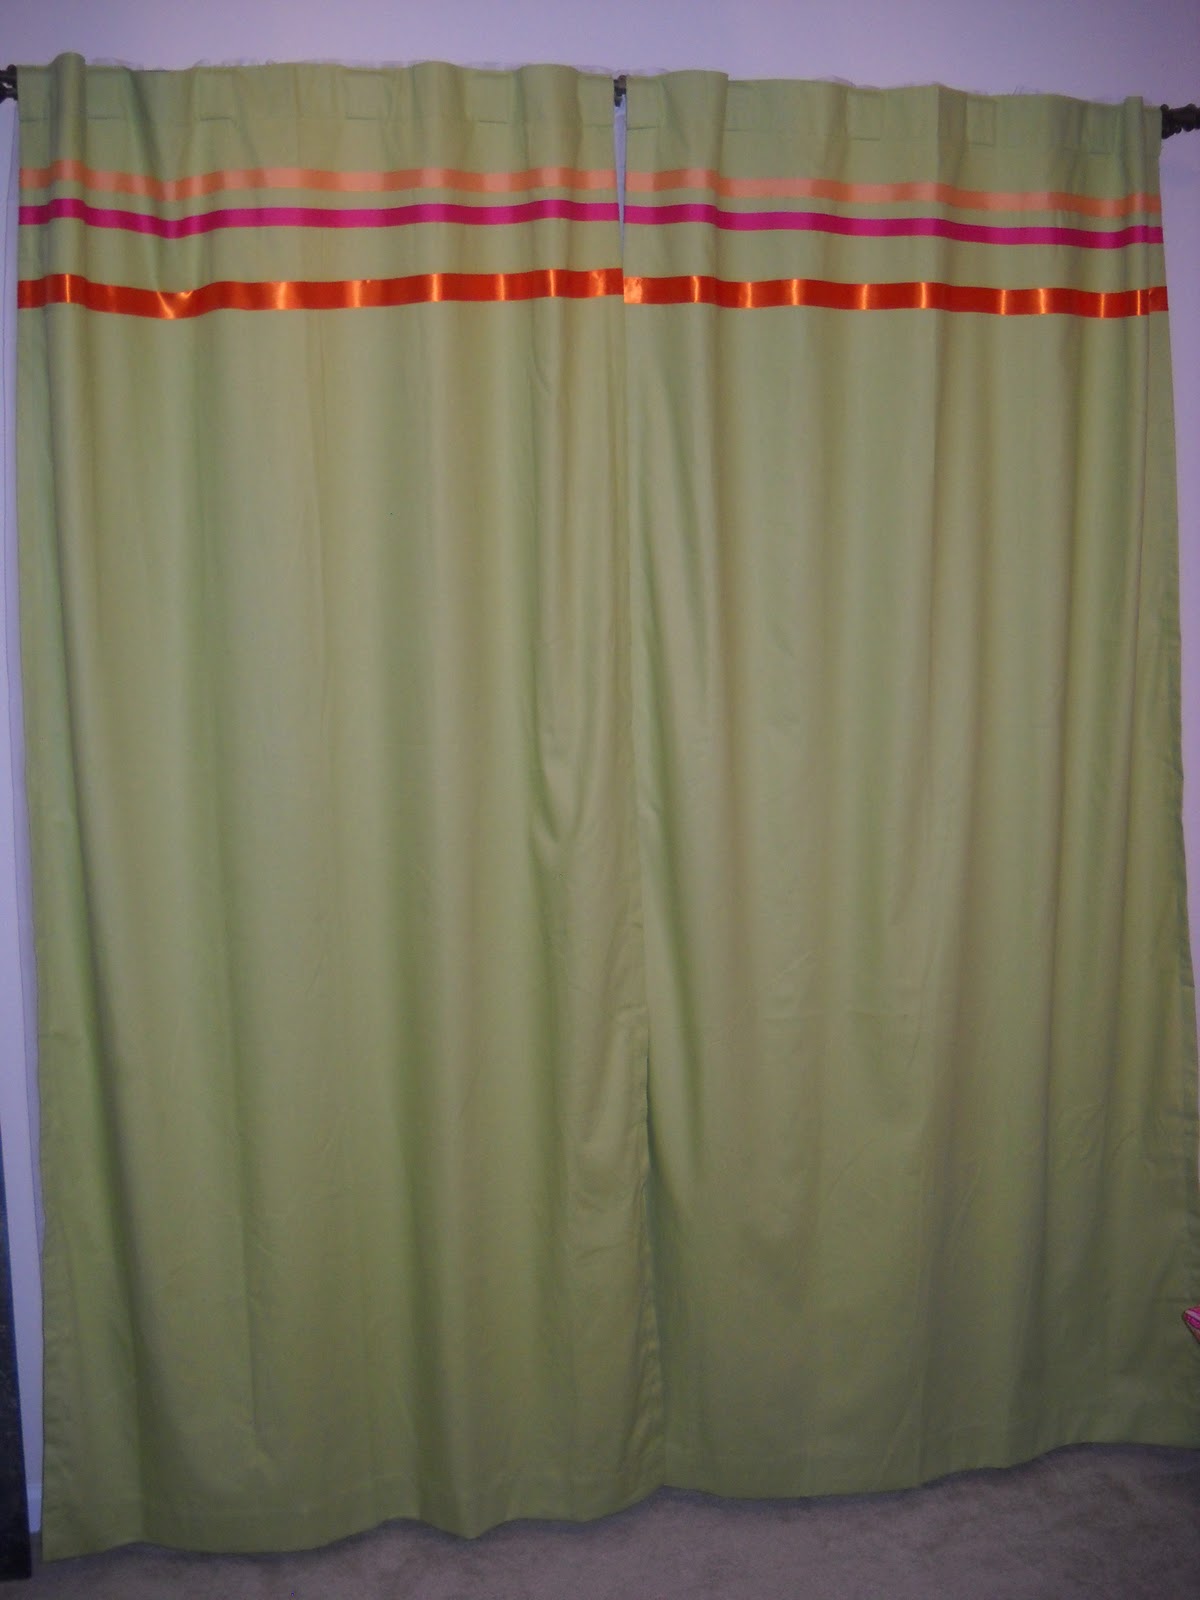
I did decide on colors for her new curtains and they were all green. (I got these at target for $18.00 and included both panels!) The green was just a bit too plain to me. So, I thought, how can I make these pop a little bit more? Adding ribbon trims to them. Ribbon really fixes everything doesn't it?!

So here is what you need:
Iron or steamer
2 panels (at the length you need. These are 84' long)
fabric glue or iron bonding glue
ribbon colors of choice
scissors 
Large ruler or measuring tape ( to help guide a straight line)

First, I Ironed both panels to get the wrinkles out. This can also be done with a steamer. I then laid one panel at a time, flat out on my carpet. Then lined one color of ribbon in a straight line on top of the curtain, where I want it to be glued down. I left about 1/2 inch on each end so it could be tucked around the sides and glued down as well. I worked my way from one side to the other lifting and gluing til I got to end. If you need to use a large ruler to help guide a straight line, don't be afraid to do so!

(sorry for the messy pic, I was in the process of figuring out what I was going to do)


Then, repeat the steps with the rest of the colors.


And Viola! Custom curtains for under $20.00!!
Thursday, March 17, 2011

Bloggers Day of Silence: Tomorrow

For Japan, With Love...........


Tomorrow, I will be participating in Bloggers Day of Silence for Japan. Tons of bloggers are taking time out of their busy schedules, to remember those in need. The day of silence is for those who endured all the effects of the major earthquake and Tsunami that hit Japan on March 11th. There will not be a new post from Sweet Memories Cakery & Designs tomorrow. A huge thank you to Utterly Engaged and Ever-Ours for helping to bring us all together to raise awareness and for creating this site.


For information on how you can help, visit the website For Japan, With Love. Please donate whatever you can. Every little bit counts. Together, we can make a difference!


Wednesday, March 16, 2011

{How To} Make St. Patrick's Day Pretzel Sticks


Are you ready for green day?! St. Patrick's Day is TOMORROW! I made the pretzel sticks, for my co-workers to spread some green love. They are so easy and simple to make. And a great addition to any dessert table or party function.

These are Green with white drizzled across the top. If you are anything like me, you like pretzels, but sometimes they seem too dry by themselves. Adding candy melts candy coating to them is the perfect touch. I LOVE pretzels dipped in melting chocolate!

These are dipped in white candy melts and sprinkled with an array of colorful sprinkles to go with the rainbow of course. I was hoping that i would have been able to find some other colorful candy melts to really make a rainbow pretzel stick with them drizzled with different colors and lined up side by side to create a rainbow, but did not have all the colors I needed. 

To make these you will need:
Pretzel sticks
candy melts
sprinkles
piping back
coupler
tip number 2 or 3
wax paper

as for the candy melts, you can even use chocolate and drizzle with green and create any combo you would like.

Melt the candy melts according to package directions. Dip your pretzel stick in the melting chocolate one at a time and lay on the wax paper to dry. Repeat using a few more, but before they dry, you want to sprinkle them with the sprinkles. Other wise the sprinkles won't stick. Then let them dry completely.

If you are using the other method with drizzling, use all the steps above except adding sprinkles. Let them dry a little before adding the drizzle effect. Get your piping bag ready. Cut the end of your bag {if using a disposable}enough so you can drop your coupler inside, but not so big that your coupler falls completely through. Unscrew the top off your coupler, drop the big part into the bag, add your tip and screw the white coupler part back on. Pour the color you wish to drizzle into the piping bag and drizzle away using side to side motions.

Hope you enjoy!!

Wednesday, March 9, 2011

{Freebie Alert} St. Patrick's Day Party Tags


Hello everyone! I do apologize for my lack of  posts. I have been BUSY! Can you believe that St. Patricks Day is coming up NEXT week. Didn't we like just enter March?! My mind has been on overload lately and I have been getting overwhelmed with ideas. I need to stop and relax and take a deep breath. But as soon as I do, My mind starts all over again. That's okay though, I love when the creative juices start flowing.

I did find out that I will be expecting a NIECE from my sister in July!!! We were anticipating what the sex was. I kinda knew that she would have a girl, she seemed to be about as sick as I was when I was preggers with Constance. SO baby shower planning to start ova here!! I cant wait!

Okay so to the Printables. I wanted to design a lot more printables for you guys to use. That didn't work so I at least wanted to design some party tags that are great for Cupcake toppers. I wanted to add a touch of another color along with the ordinary green. I chose a lighter green and a pewter color. I like the way they turned out. And I hope you do as well. Feel free to share with your friends and family! 

Click here or on the picture to download yours!!


Monday, February 28, 2011

{Recipe} Coconut Cupcakes


Coconut cupcakes topped + toasted shredded coconuts = YUMMY! I made these cupcakes for my Mother-in-law just about a month ago. It was kind of hard coming up with a flavor she would like. All she said was "surprise me". Then I remembered that she liked coconuts and she would make coconut pies a lot. Then the light bulb came on and I created  a coconut cupcake recipe and got busy. She LOVED them. I really loved the toasted coconut topping. It really can be enjoyed by itself as a tasty snack :-)

Go ahead and give them a try and tell me what you think.

Ingredients

2 sticks unsalted butter, room temperature
2 cups sugar
4 large eggs at room temperature
1 teaspoon coconut extract
1 teaspoon pure vanilla extract
2 3/4 cups unbleached all purpose flour
1 teaspoon baking powder
1/2 teaspoon baking soda
1/2 teaspoon kosher salt
1 cup buttermilk or coconut milk (depending on how much coconut flavor you want)

For the frosting:

1 pound cream cheese at room temperature
2 sticks unsalted butter, room temperature
1 teaspoon pure vanilla extract
3  to 4 cups confectioners' sugar, sifted

Coconut Topping: 

1 1/2 cup of sweetened shredded coconut

Directions

Preheat oven to 375 degrees. Spread coconut flakes in an even layer on a parchment paper-lined baking sheet. Bake until golden, 5 to 7 minutes; set aside to cool. 
 
Reduce oven temp to 325 degrees.
In the bowl of an electric mixer fitted with the paddle attachment, cream the butter and sugar on high speed until light and fluffy, about 6 - 8 minutes. With the mixer on low speed, add the eggs, 1 at a time, scraping down the bowl after each addition. Add the vanilla and coconut extracts and mix well.
In a separate bowl, sift together the flour, baking powder, baking soda, and salt. In 3 parts, alternately add the dry ingredients and the buttermilk to the batter, beginning and ending with the dry. Mix until just combined.

Line a muffin pan with paper liners. Fill each liner to the top with batter. Bake for 22 - 28 minutes, until the tops are brown and a toothpick comes out clean. Allow to cool in the pan for 15 minutes. Remove to a baking rack and cool completely.
Meanwhile, make the frosting. In the bowl of an electric mixer fitted with the paddle attachment, on low speed, cream together the cream cheese, butter, and vanilla extract. Add the confectioners' sugar and mix until smooth.

Frost the cupcakes and sprinkle with the toasted coconut.

Wednesday, February 9, 2011

Valentine's Day Heart Blondies

Blondies.....One word - Yummy! In case you have never heard of them, these brown sugar sweets are the "blonde" version of the chocolate brownie. Therefore, you get "blondie". I have always loved these and for the longest time, I would never make them. I would always have my friend's mom make some or buy some when ever I could find them. You can't just go to the store or bakery here and plan on buying blondies. It will most certainly be a time when you just come across them and your eyes get big wanting to buy them all!


These blondies are SO easy to make and are DELISH! There are so many possibilities for different variations as well. I have made them with pecans in the batter, chocolate chips, and I have even seen some made with shredded coconut baked in them. I wanted to make something heart shaped a few days ago and thought why not make some blondies?! So here is my version of the recipe. I hope you enjoy!


Blondies
2 Cups Unbleached All-purpose flour
2 1/2 cups firmly packed light brown sugar
2 teaspoons baking powder
1/2 teaspoon salt
1 teaspoon pure vanilla extract
10 tablespoons unsalted butter
3 whole eggs (room temp)
Cooking spray

Preheat oven to 350. (325 if using a dark non-stick pan)

Sift Flour. Lightly spoon flour into dry measuring cups; level with a knife. Combine flour, sugar, baking powder, and salt in a large bowl.

Place butter in a microwave safe bowl and heat until melted. Let cool for about 4-5 min. Crack eggs into a bowl and beat with whisk until blended well. Combine butter, vanilla and eggs, stirring with a wire whisk. Pour butter mixture over flour mixture; stir just until moistened.

Spoon batter into a 13 x 9-inch baking pan coated with cooking spray; smooth top with spatula. (I use my nonstick cookie sheet - I like the thinness and amount of blondies I can get out of this size);  Bake at 350° for 30 minutes or until a wooden pick inserted in center comes out clean. Cool in pan on a wire rack. Cut into 48 squares.

Top with some vanilla or butter pecan ice cream for an extra special treat!

Wednesday, February 2, 2011

{Freebie} Superbowl Team Printable Tags

Are you guys ready for the Superbowl? Greenbay Packers vs. Pittsburgh Steelers. It is going down this Sunday! I want to have a get together here at our home, but not quite sure if that is going to happen. If it does, it will be VERY last minute. I have to work all this week (my full-time job) and on Saturday all my co-workers including myself have to go away all day long for DSS training. Wahoo! So much fun *in my most sarcastic voice*

I did want to create a free printable for you to use during your parties. There is one for the Steelers and one for the Packers. I hope you all have loads of fun and find lots of creative ways on using them!


LinkWithin

Related Posts with Thumbnails